Got a plain tote bag staring back at you, just begging for a little personality? You’ve come to the right place! Forget complicated techniques – we’re diving into super fun and easy tote bag painting ideas that anyone can do. Let’s grab some paints and turn that blank canvas into your new favorite accessory!
25 Easy Tote Bag Painting Ideas Anyone Can Try (Beginner-Friendly & Fun!)
1. Retro ‘Here Comes The Sun’ Design
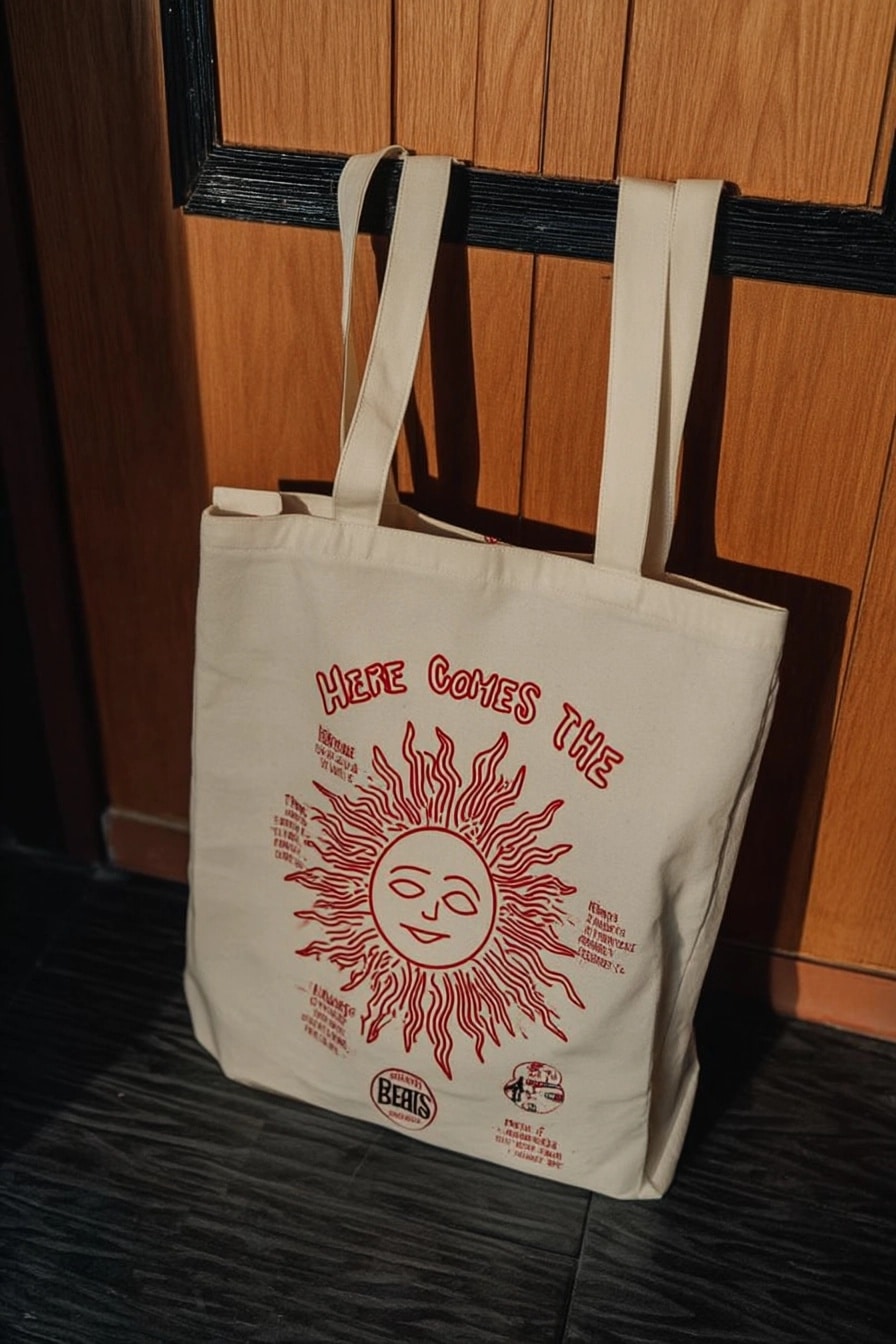
Okay, how cheerful is this sunny design? It’s got such a cool, vintage vibe. Using just one color, like this bright red, makes it super simple but really bold.
To get clean lines like this, you could try making a stencil out of freezer paper. Iron it shiny-side-down onto the bag, paint inside the lines, and peel it off once dry. Or just embrace the hand-drawn look!
I remember trying something similar on a t-shirt years ago and totally messing up the lettering. Lesson learned: sketch with chalk first! It brushes right off canvas.
2. Simple Lavender Sprigs Corner
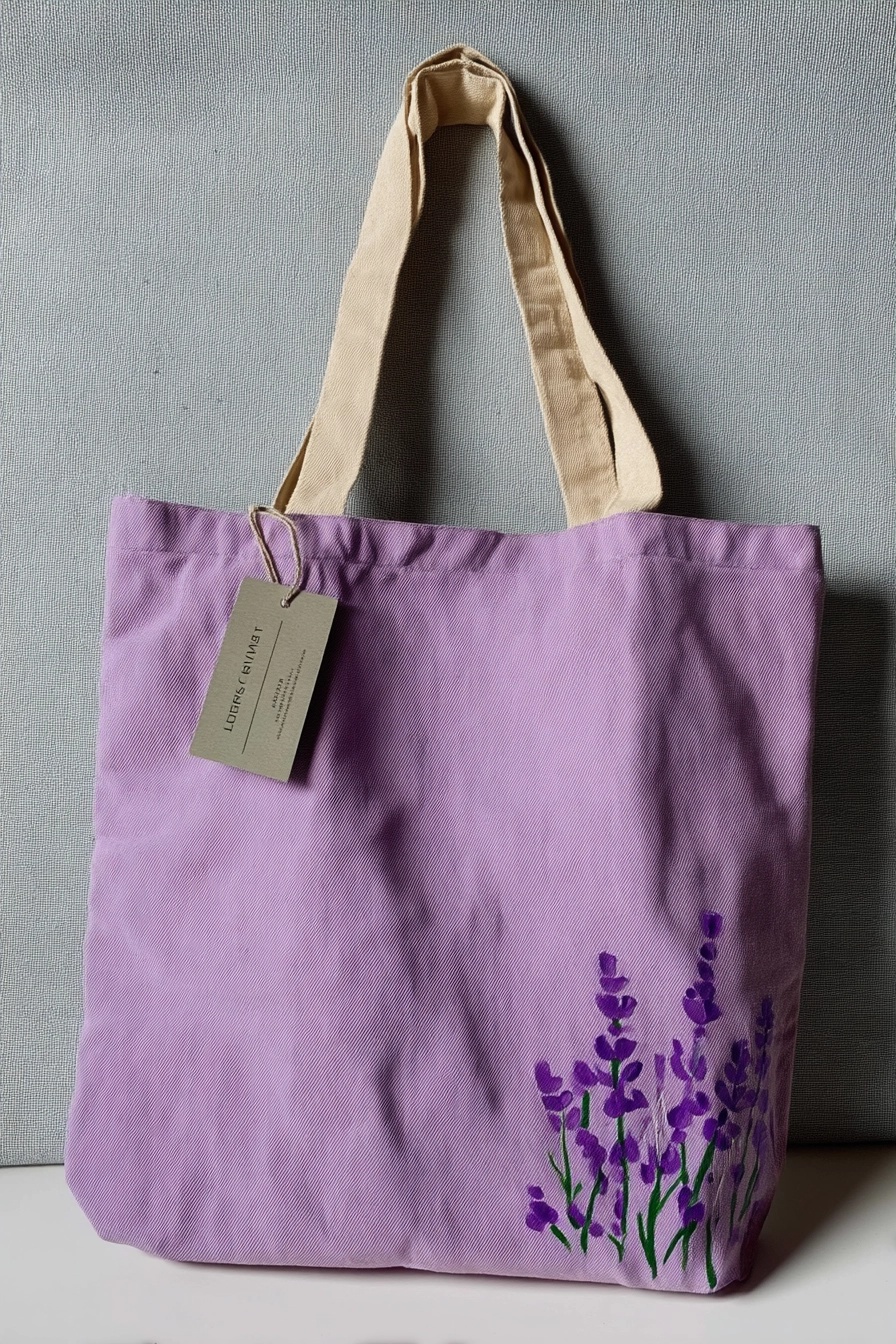
Flowers don’t have to be complicated! These little lavender sprigs are proof. Just some simple green stems and dabs of purple paint create a really pretty, delicate look.
This works great tucked into a corner, leaving lots of space on the bag. You could use different shades of purple for depth, or even add a little white for highlights.
For stems this fine, a thin liner brush is your best friend. Dip just the tip in green paint. For the blossoms, try dabbing with the end of the brush handle or even a cotton swab!
3. Easy Beachy Stamps & Doodles
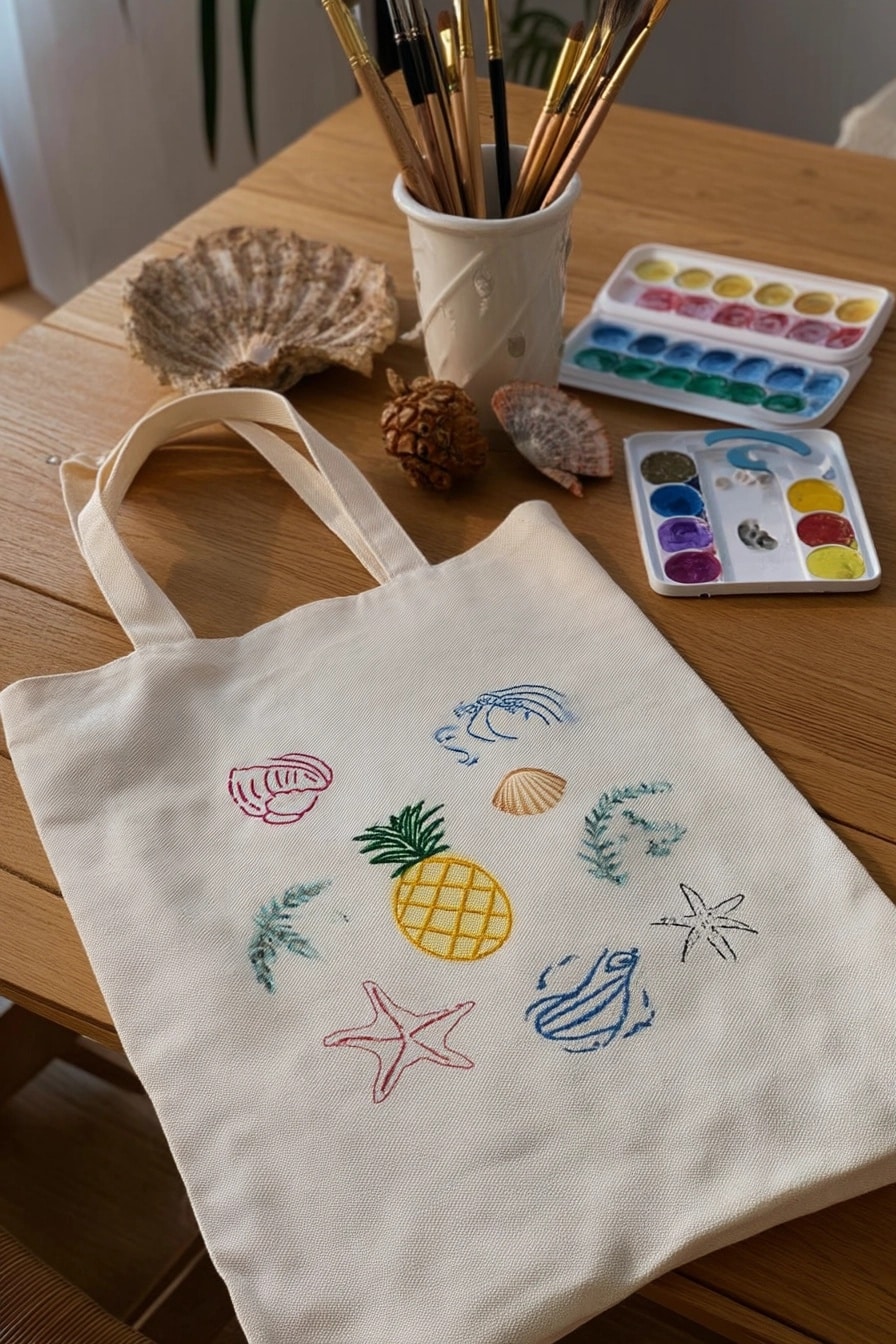
Ah, the beach! Bring those coastal vibes home with simple painted shapes. This one looks like they used stamps or maybe simple freehand doodles.
You can totally make your own stamps from craft foam or even potatoes! Or just sketch simple outlines like starfish, shells, maybe a little pineapple for fun.
Notice the paints here look like watercolors? While pretty, Warning: traditional watercolors might wash out or bleed on fabric. Stick with acrylic craft paint or fabric paint for bags you plan to use often!
4. Cute Farmers Market Lemon Tote
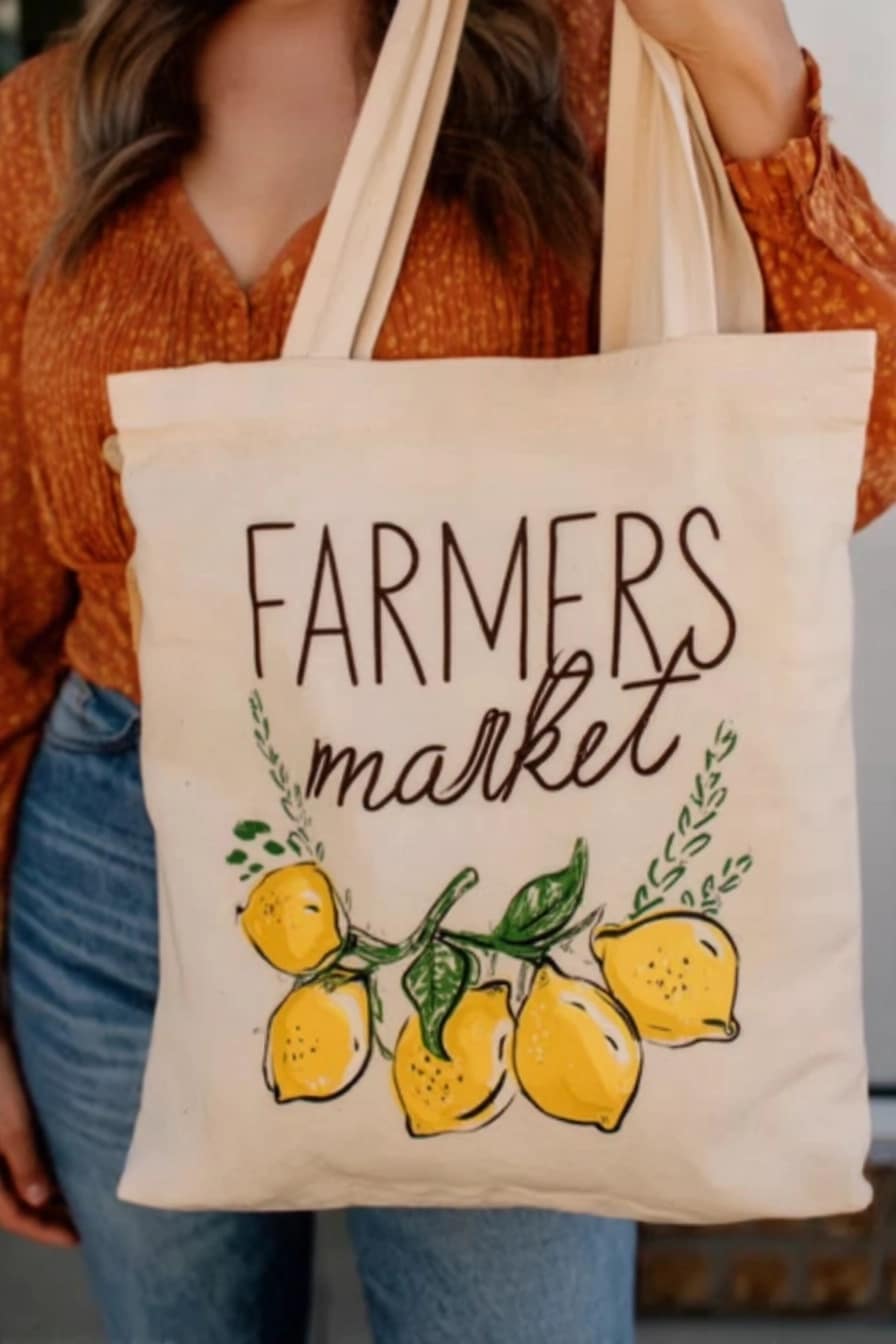
Perfect for hauling your veggies! This ‘Farmers Market’ tote with bright lemons is so charming and surprisingly easy to recreate.
The key here is the simple, slightly sketchy black outline combined with blocks of yellow and green. Don’t worry about perfection; the loose style is part of the appeal.
For the lettering, you can use a fabric marker for more control or paint it carefully with a fine brush. I like using paint markers like Posca pens for this kind of thing.
- Pros: Great control, vibrant colors.
- Cons: Can be pricey, might need heat setting.
5. Artistic Book Lover’s Bag
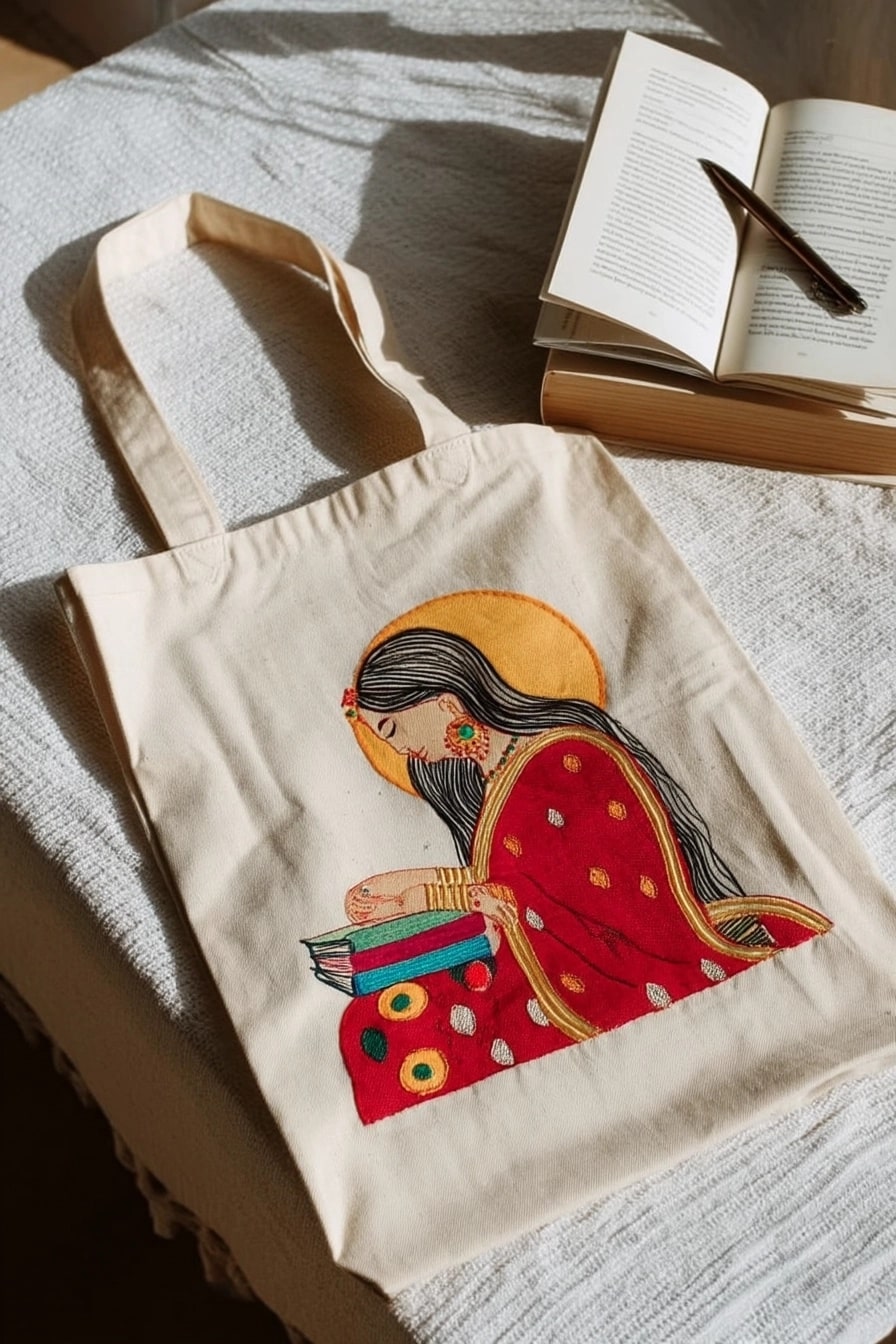
Okay, this one is definitely more detailed, but still achievable! It’s a beautiful illustration perfect for anyone who loves to read.
If drawing figures feels tricky, try simplifying it. Focus on the stack of books and maybe just the suggestion of a person. Or, find a simple line drawing online to trace using transfer paper.
The colors here are gorgeous. Notice how the gold paint adds a really special touch. Metallic fabric paints are awesome for adding a little sparkle!
6. Easy Aesthetic Smiley Face Pattern
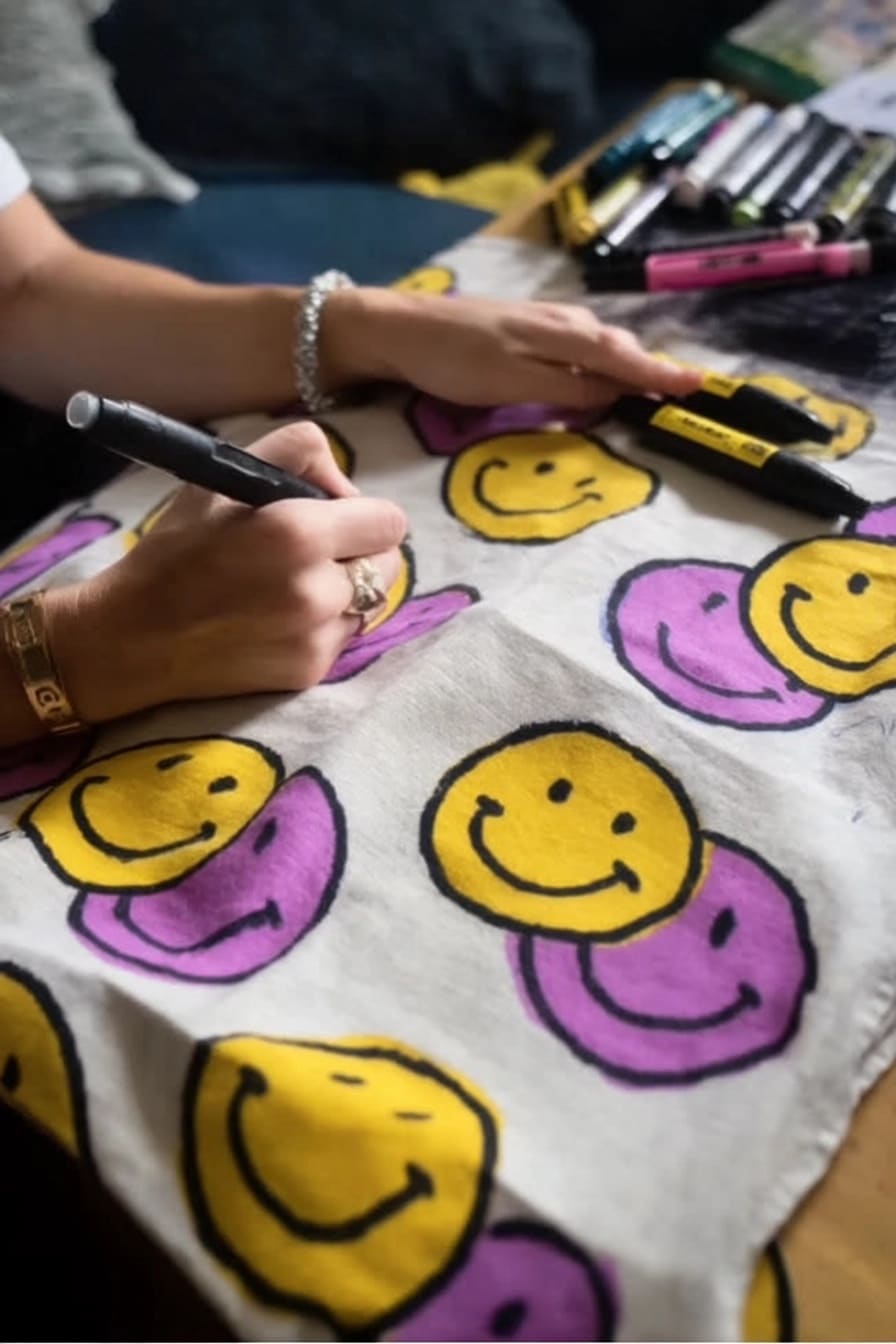
Smiley faces are HUGE right now, and they make for such a fun, easy tote bag pattern. Look how simple this is using just two colors!
Paint markers are perfect for this. You can draw the circles and faces directly onto the fabric. Staggering them like this makes the pattern feel more dynamic.
My controversial take? Sometimes the perfectly drawn smiley looks less cool than a slightly wobbly, hand-drawn one. Embrace the imperfections, it adds character!
7. ‘My Lovely Friends’ Cat & Girl Illustration
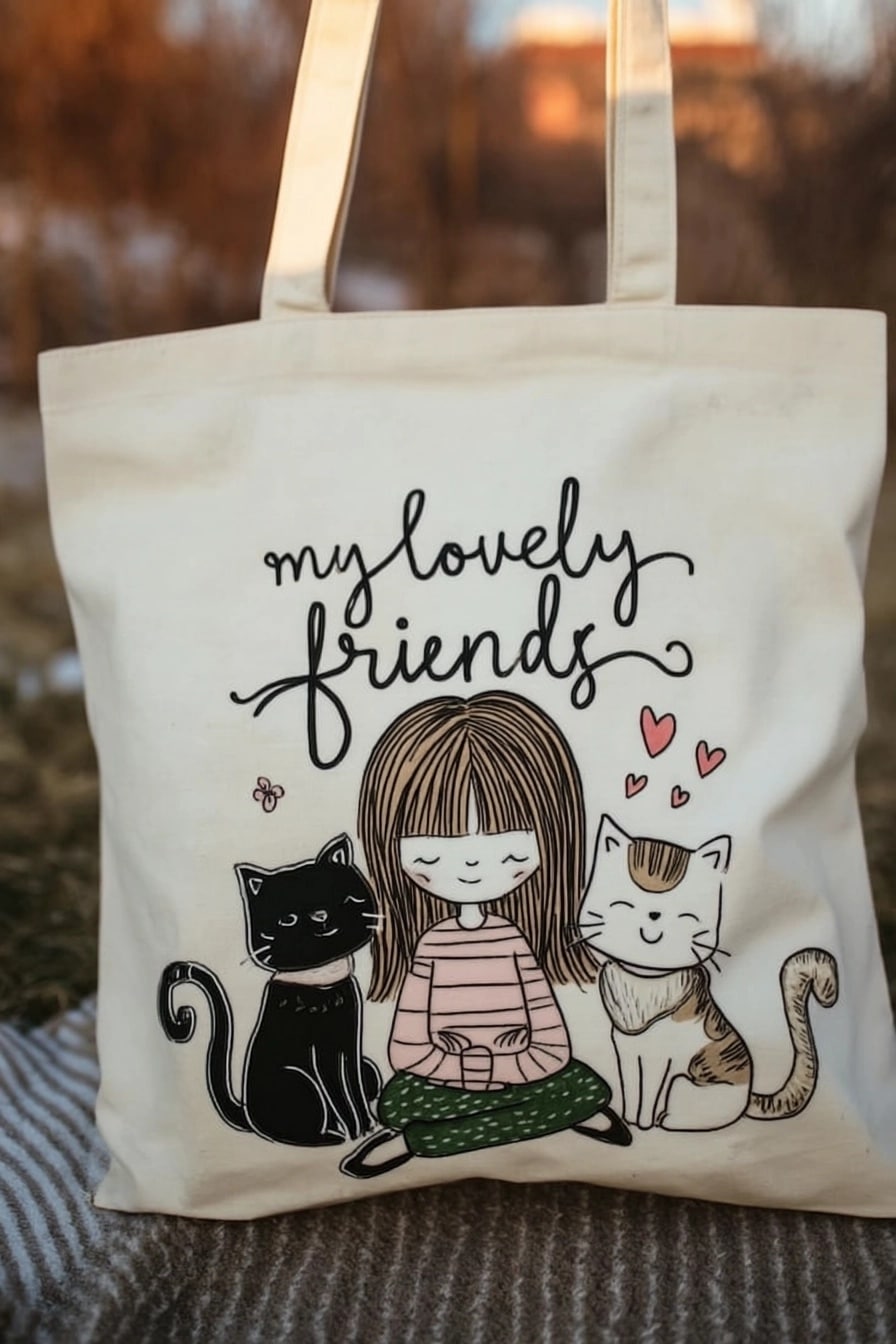
How sweet is this? A simple illustration celebrating furry friends. This style uses clean outlines filled with flat color, making it great for beginners.
Again, don’t feel you have to draw complex figures. You could simplify this to just cat silhouettes or paw prints with the text.
Using a fine-tipped black fabric marker for the outlines after the paint dries can really make the design pop and hide any slightly messy paint edges. Works like a charm!
8. Simple Kawaii Cloud Pattern
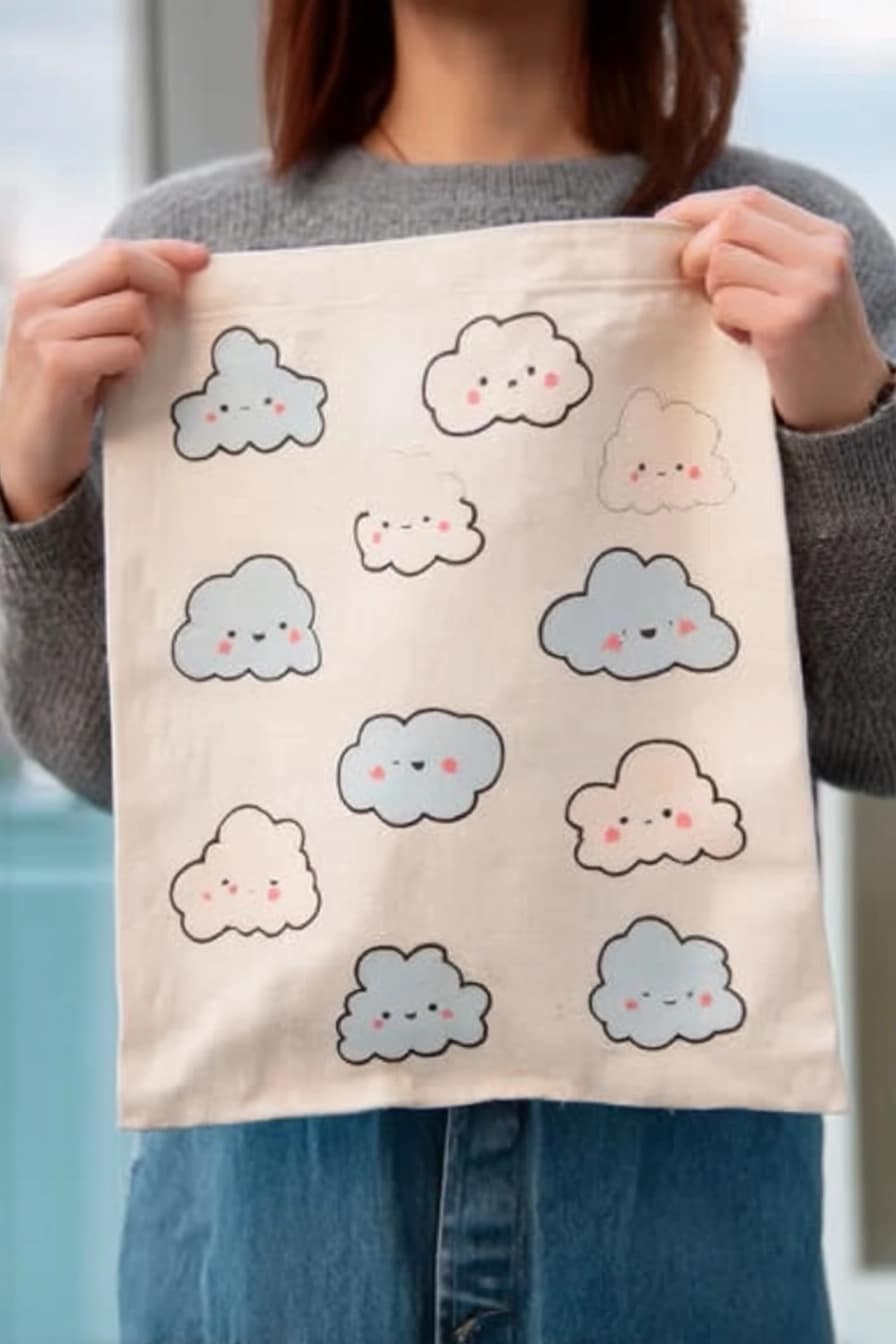
You can’t get much cuter or easier than these kawaii clouds! Just simple puffy shapes with little faces. Adorable!
Paint the cloud shapes first (maybe light blue and pink like this, or just white). Let them dry completely, then add the faces with a black fine-tip fabric marker.
A little blush on the cheeks (just a dab of pink paint applied with a dry brush or fingertip) really amps up the cuteness factor. So simple, so effective.
9. Artsy Coffee Cup Splatter
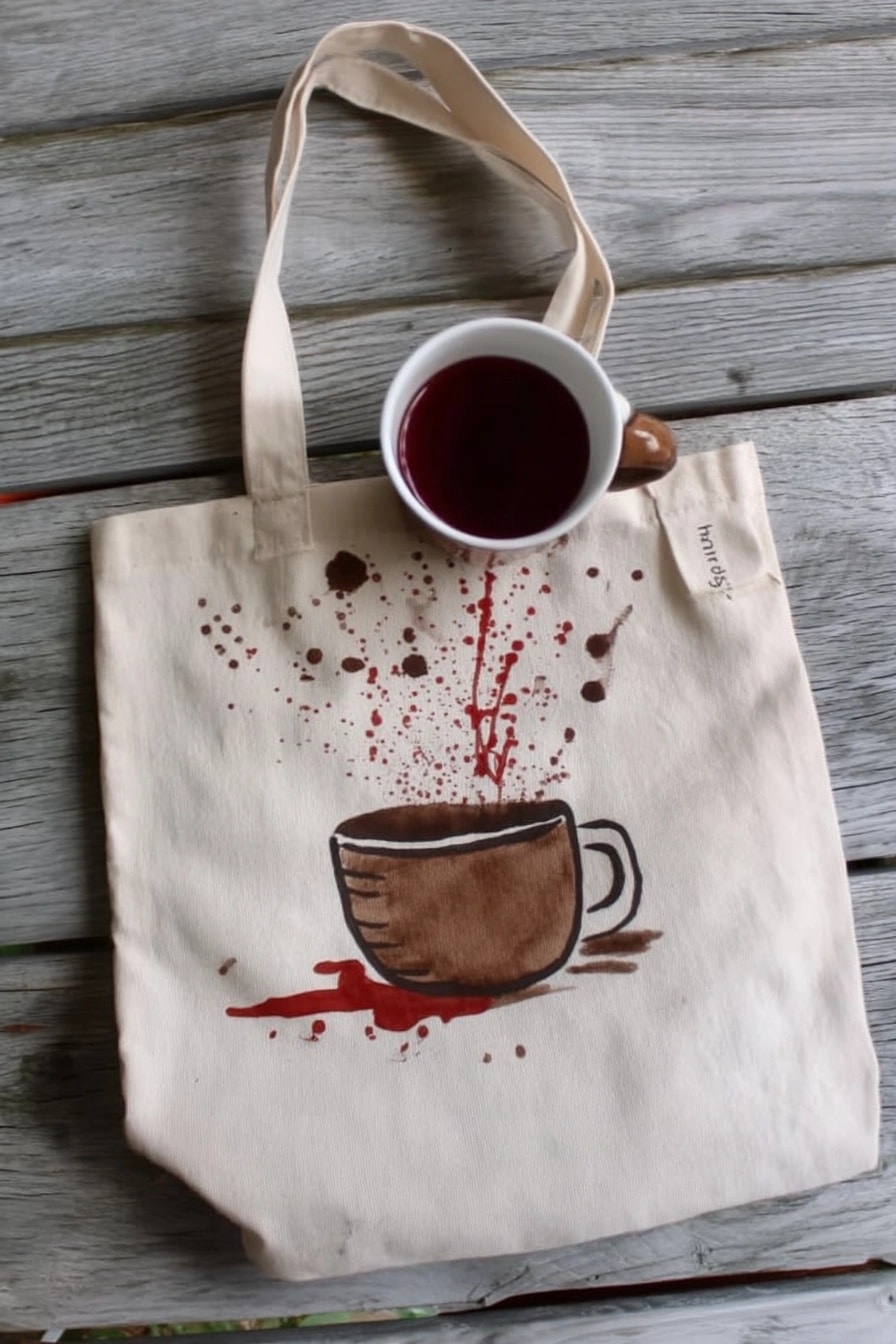
For the coffee obsessed! This design combines a simple mug illustration with fun, messy paint splatters. It looks like a happy accident, but totally on purpose.
Paint the mug first. Once it’s dry, protect the area around it if you want clean edges (or don’t!). Then, load a brush with watery brown paint and flick or tap it over the bag.
Pro Tip: Practice your splattering technique on scrap paper first! Control the amount of paint and water to get the splatter size you want. It can get messy fast, trust me on that one.
10. Vibrant Painted Sunset Beach Scene
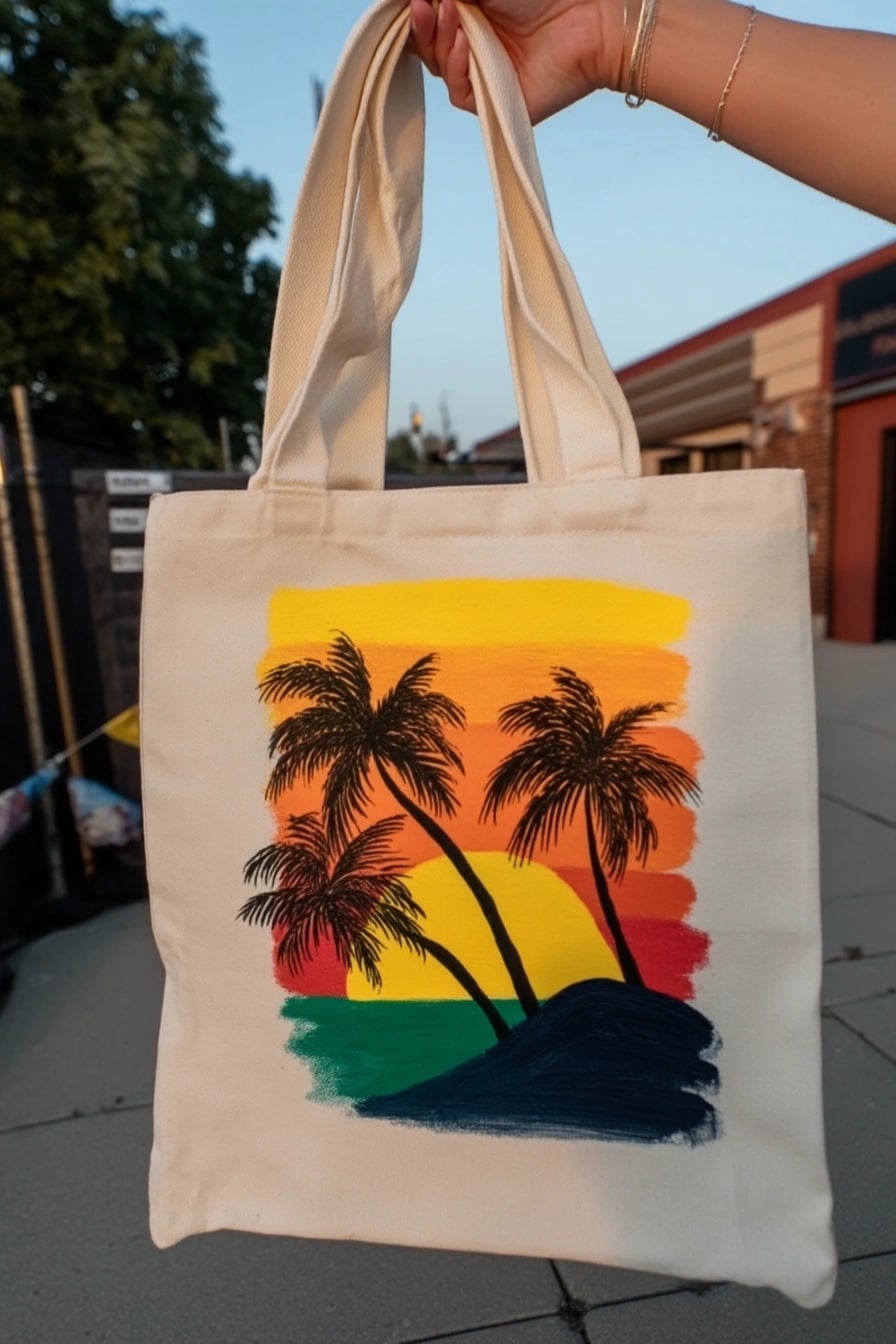
Bring the beach sunset home! This design looks impressive but uses simple blocks of color blended together for the sky and sea.
Paint the background colors first – yellow, orange, red, teal, blue. While the paint is still slightly wet, you can blend the edges softly with a clean brush.
Let the background dry completely. Then, paint the palm tree and island silhouettes right over top using black fabric paint or a marker. Easy peasy tropical vibes!
11. Cool Blue Jellyfish Designs
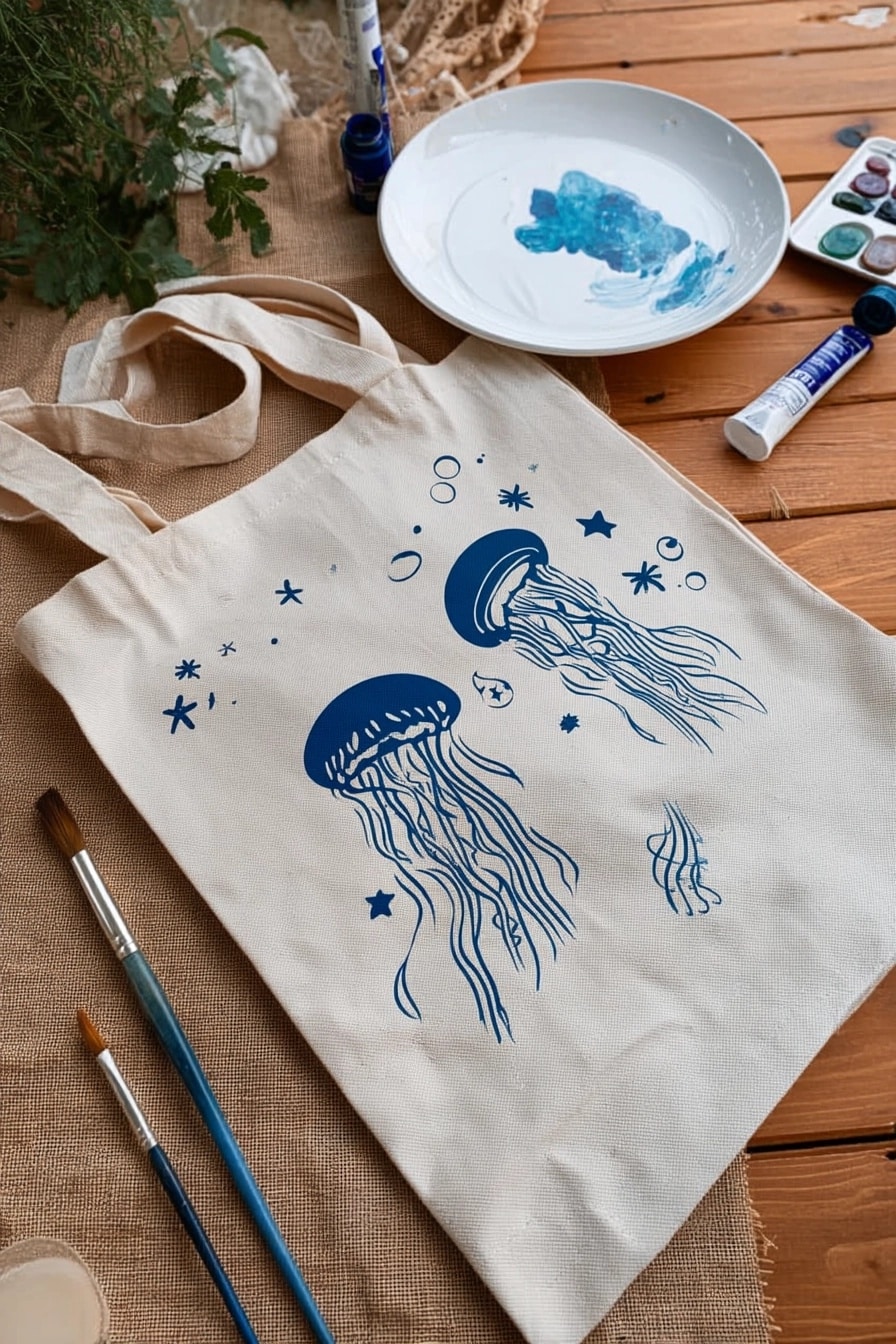
How elegant are these jellyfish? Using just one color like this deep blue makes a sophisticated statement. It looks like a print!
You could achieve this with a stencil, or by carefully painting the shapes. Focus on the bell shape at the top and then add lots of flowy, wiggly tentacles below.
Adding tiny white dots for bubbles or highlights can bring these ethereal creatures to life. A white paint pen would be perfect for that final touch.
12. Cute Colorful Painted ‘Patches’
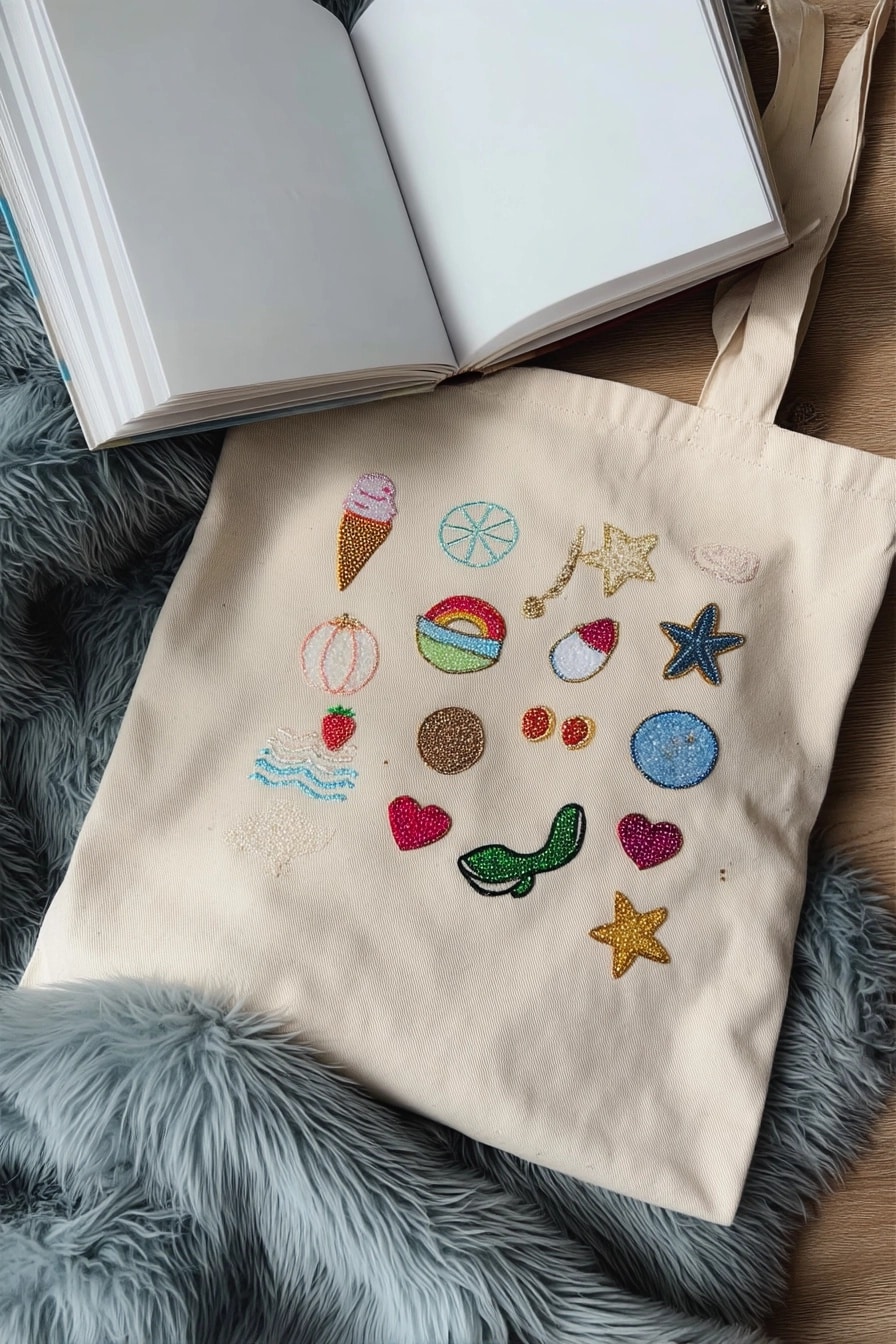
Can’t decide on one design? Paint lots of little ones! This looks like a collection of cute, colorful patches scattered across the bag.
Think simple shapes: hearts, stars, waves, maybe a little sun or fruit. Use bright, happy colors. Some of these look like they might even have glitter paint or beads added!
This is a fantastic way to use up small amounts of leftover paint colors. Just doodle whatever comes to mind! It’s supposed to look random and fun.
13. Bold & Bright Marker Flowers
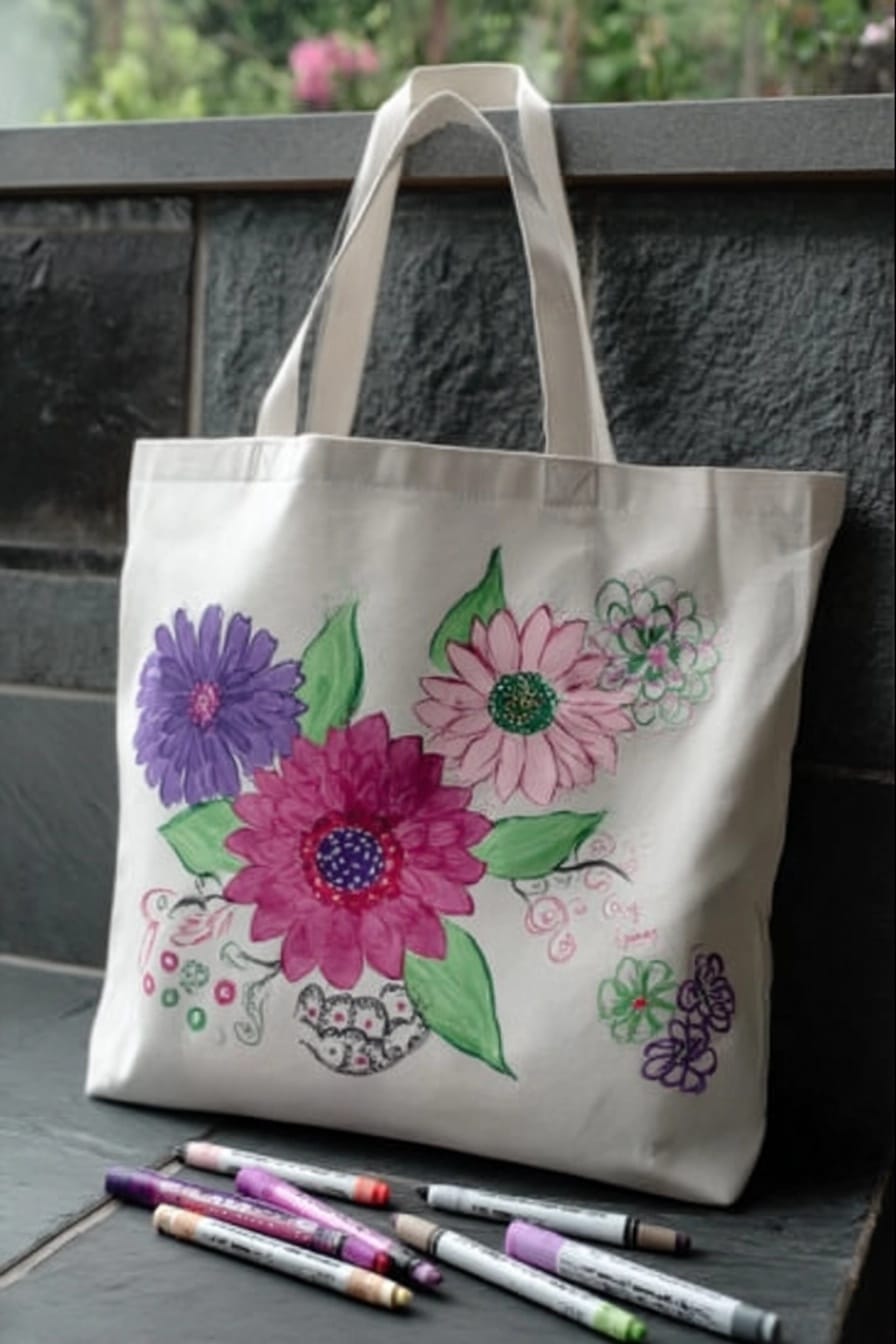
Make a statement with big, bold flowers! This style looks like it was done mainly with paint markers, giving it that vibrant, solid color look.
Don’t overthink the flower shapes. Simple circles, pointy petals, maybe some easy leaves. The bright colors are doing all the heavy lifting here.
Layering colors can add interest. See how some petals have darker outlines or centres? Let the base color dry before adding details on top.
14. Stylish Pomegranate Fruit Pattern
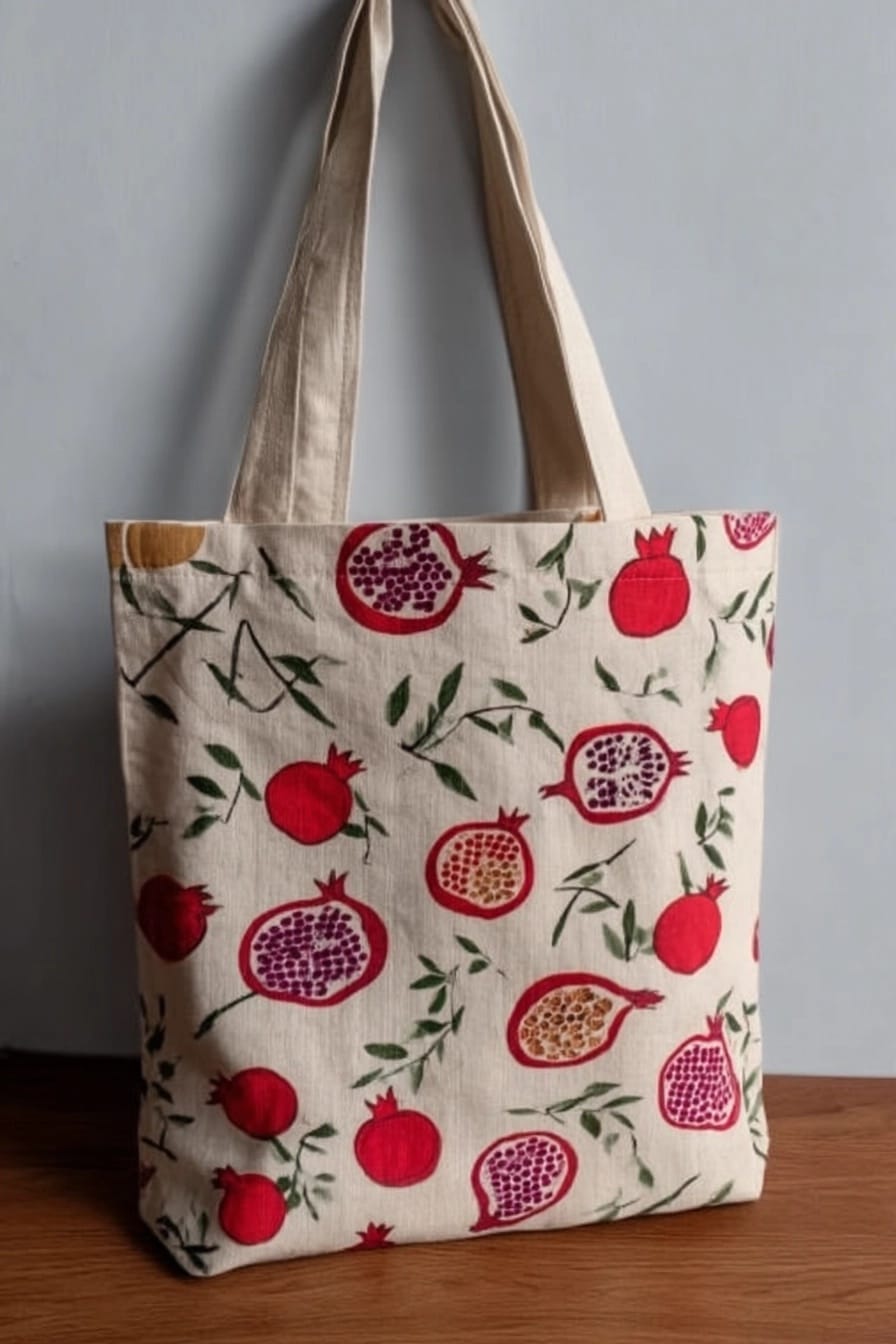
Fruit patterns are always fun! This all-over pomegranate design is really stylish. Showing some whole and some cut open adds visual interest.
Break it down into simple shapes: red circles for the main fruit, simple green leaves, and dots or small shapes for the seeds inside the cut ones.
Creating an all-over pattern like this takes a bit more planning. Lightly sketch where you want the main fruits to go first, then fill in with leaves. Or just go for it randomly!
15. Adorable Potted Cactus Trio
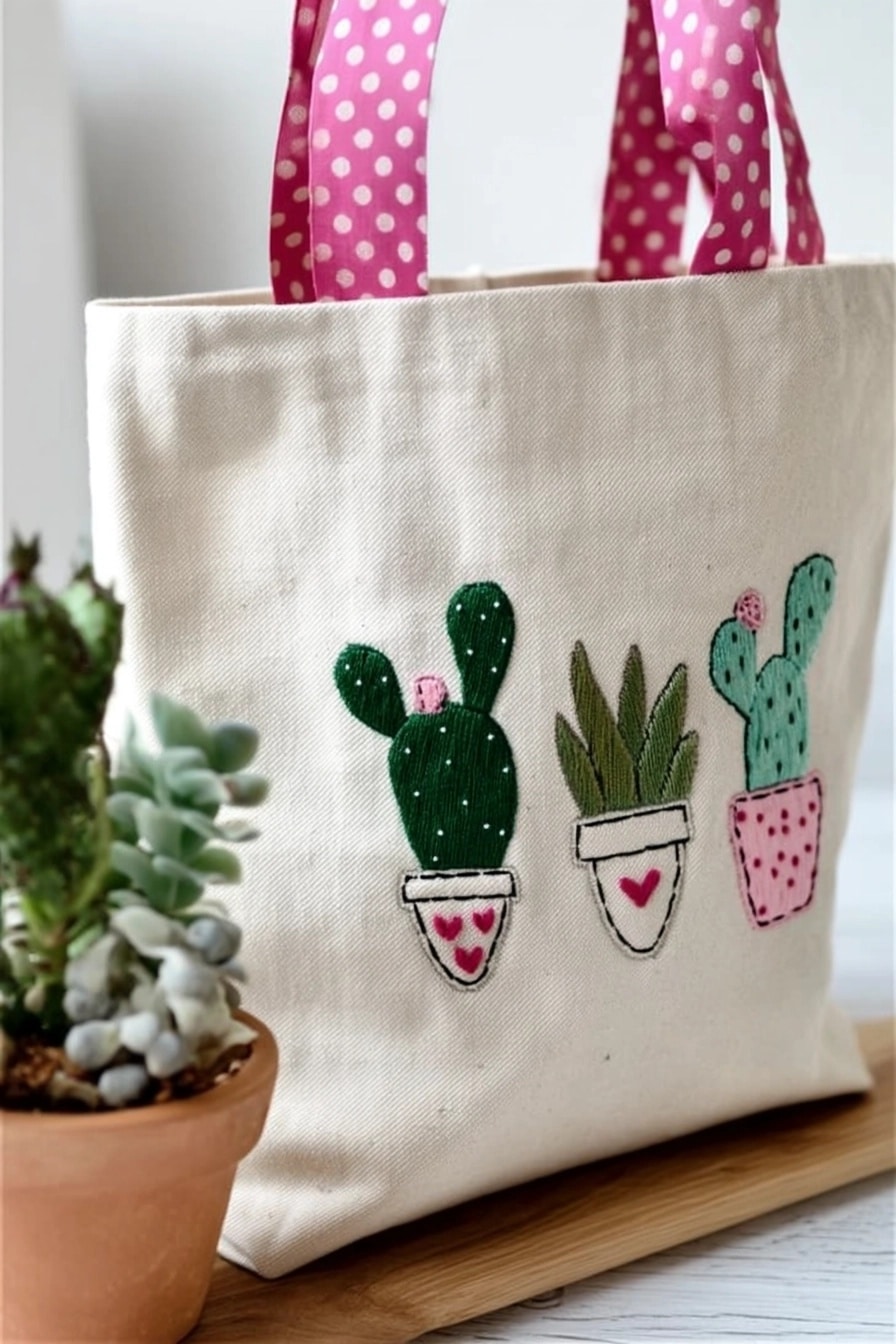
Plant lovers, this one’s for you! These little potted cacti are incredibly cute and easy to paint. Each one is just a few simple shapes.
Paint the pot shape first, then the green cactus shape on top. Add details like spikes (simple lines or dots), little flowers, or cute faces on the pots with a fine brush or marker.
These look like they might have some embroidery details too, like the white dots. That’s a great way to add texture, but simple paint works perfectly fine on its own!
16. Sweet & Simple Cherry Scatter
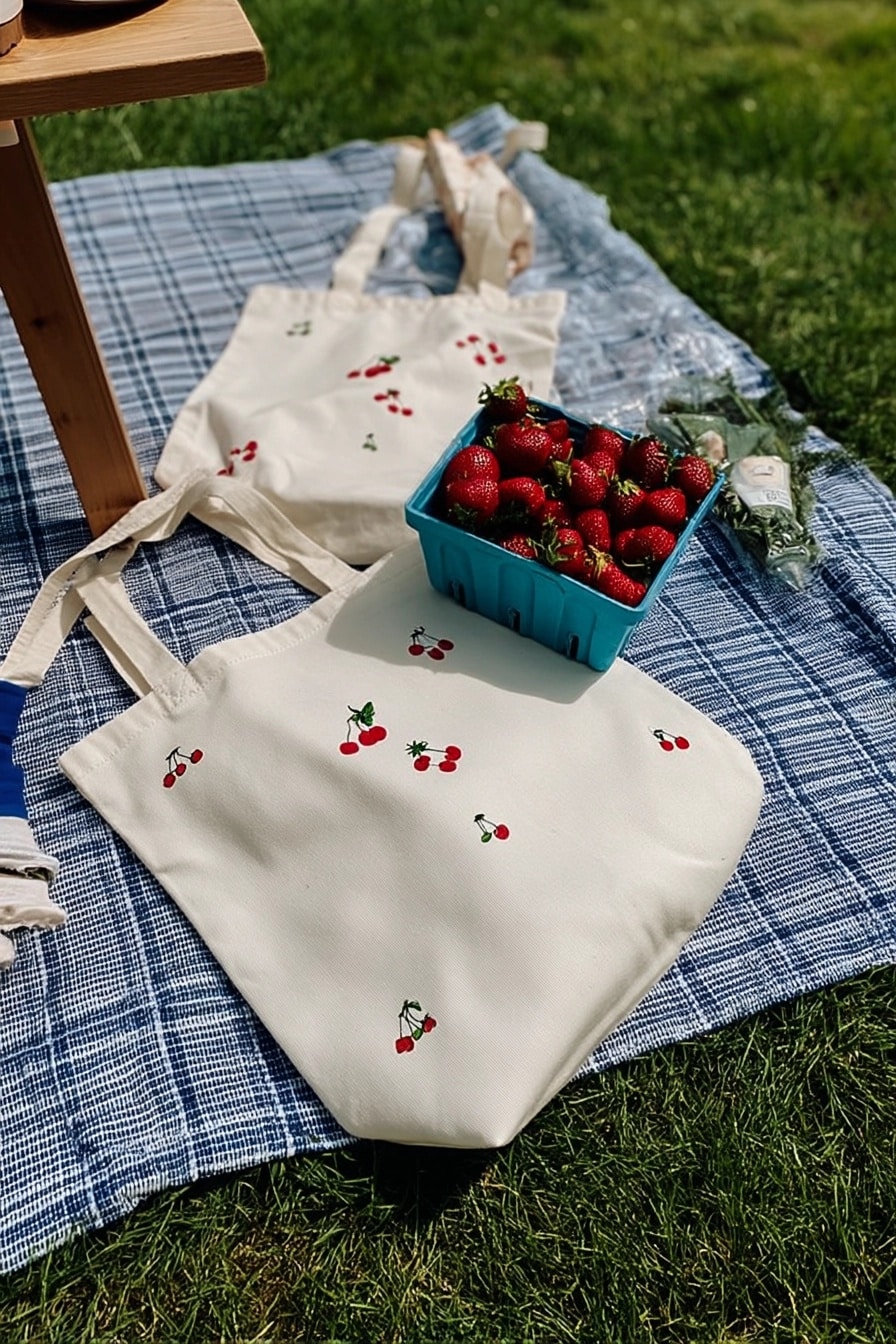
It doesn’t get much simpler than this! A scattering of tiny cherries makes for a really sweet and delicate pattern. Perfect for a picnic tote!
Each cherry is just two red dots connected by thin green stems. You could paint these freehand easily, or make a tiny stamp for the cherry pairs.
I love how minimalist this is. Sometimes less really is more! You could do the same idea with tiny strawberries, blueberries, or even little lemons.
17. ‘Don’t Worry Be Happy’ Floral Quote
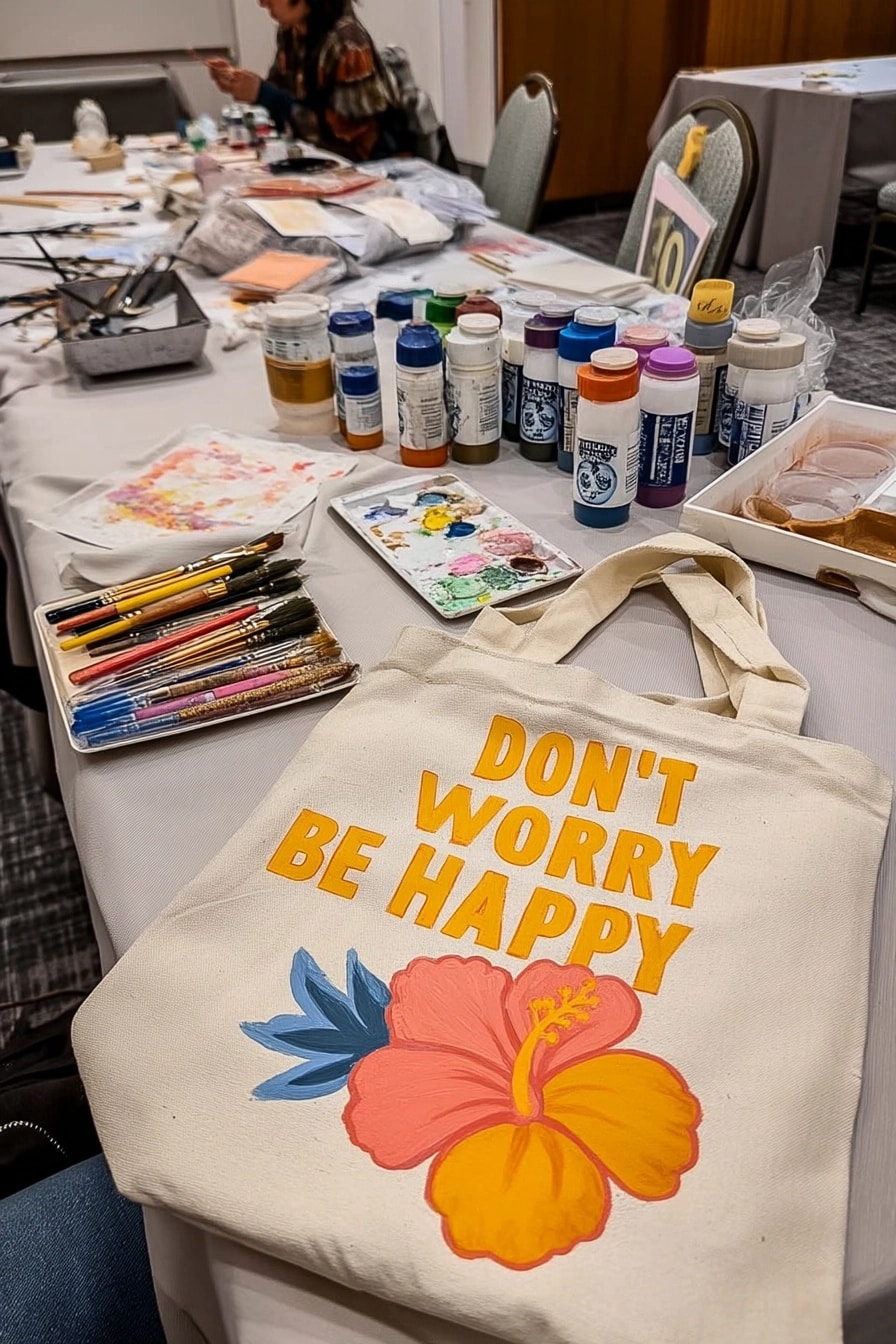
Combine an uplifting quote with a bold flower for a cheerful design. This “Don’t Worry Be Happy” tote uses block letters and a simplified hibiscus.
For lettering like this, stencils can be helpful for keeping things neat. Or print your quote, trace it onto the bag using transfer paper, and paint it in.
The flower uses simple shapes and colors. Don’t feel pressured to make it look realistic; a stylized flower often looks cooler on a tote bag anyway!
18. Colorful Fruit & Flower Doodles
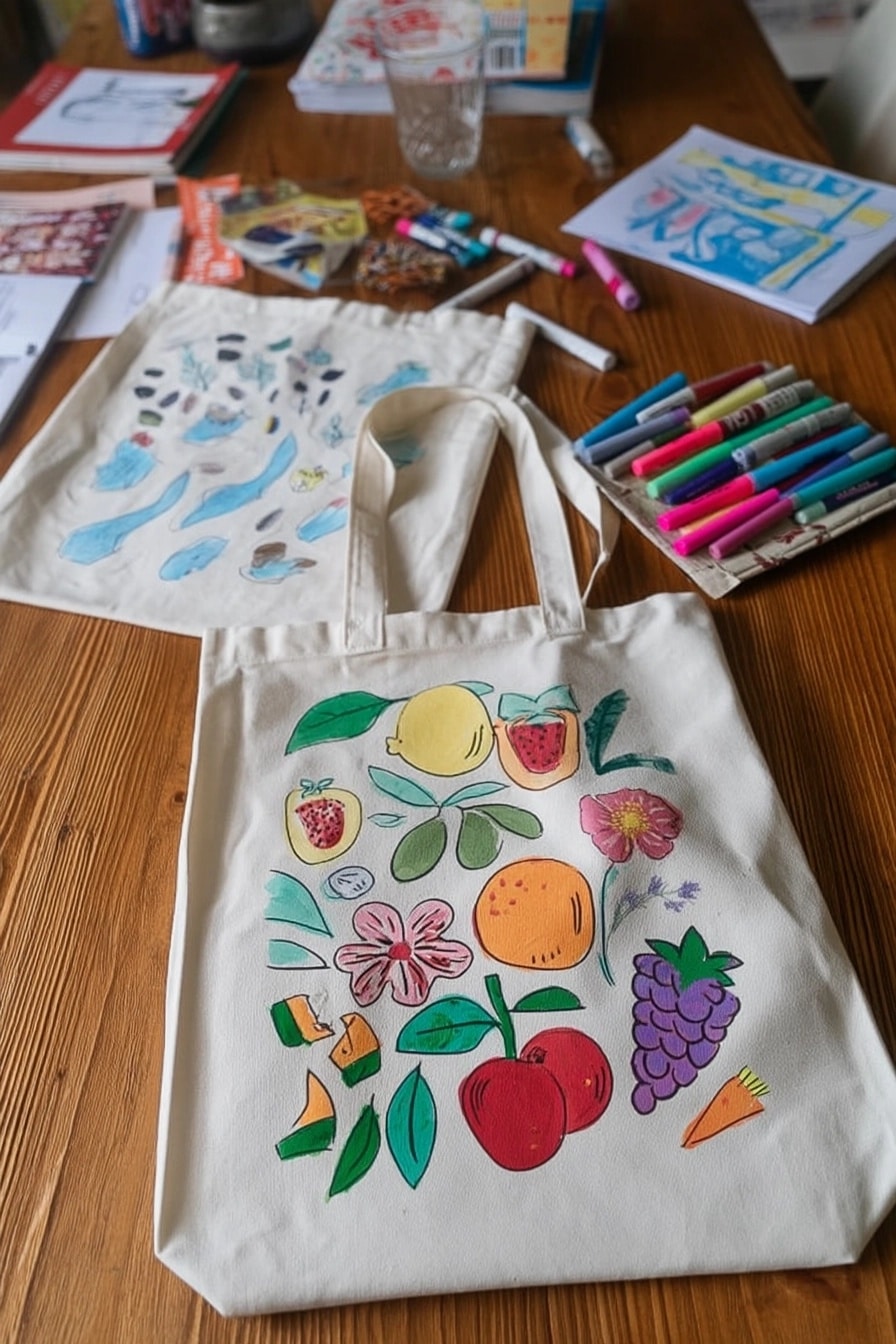
Embrace your inner doodler! This tote bag looks like a page from a sketchbook, filled with colorful, simple drawings of fruits and flowers.
There are no rules here! Just paint simple shapes – apples, oranges, grapes, abstract flowers, leaves – and fill a section of your bag. Outline them in black if you like that defined look.
This is another great project for using up leftover paint. Mix and match colors and shapes. The more random, the better!
19. Trendy ‘Happy Day’ Graphic
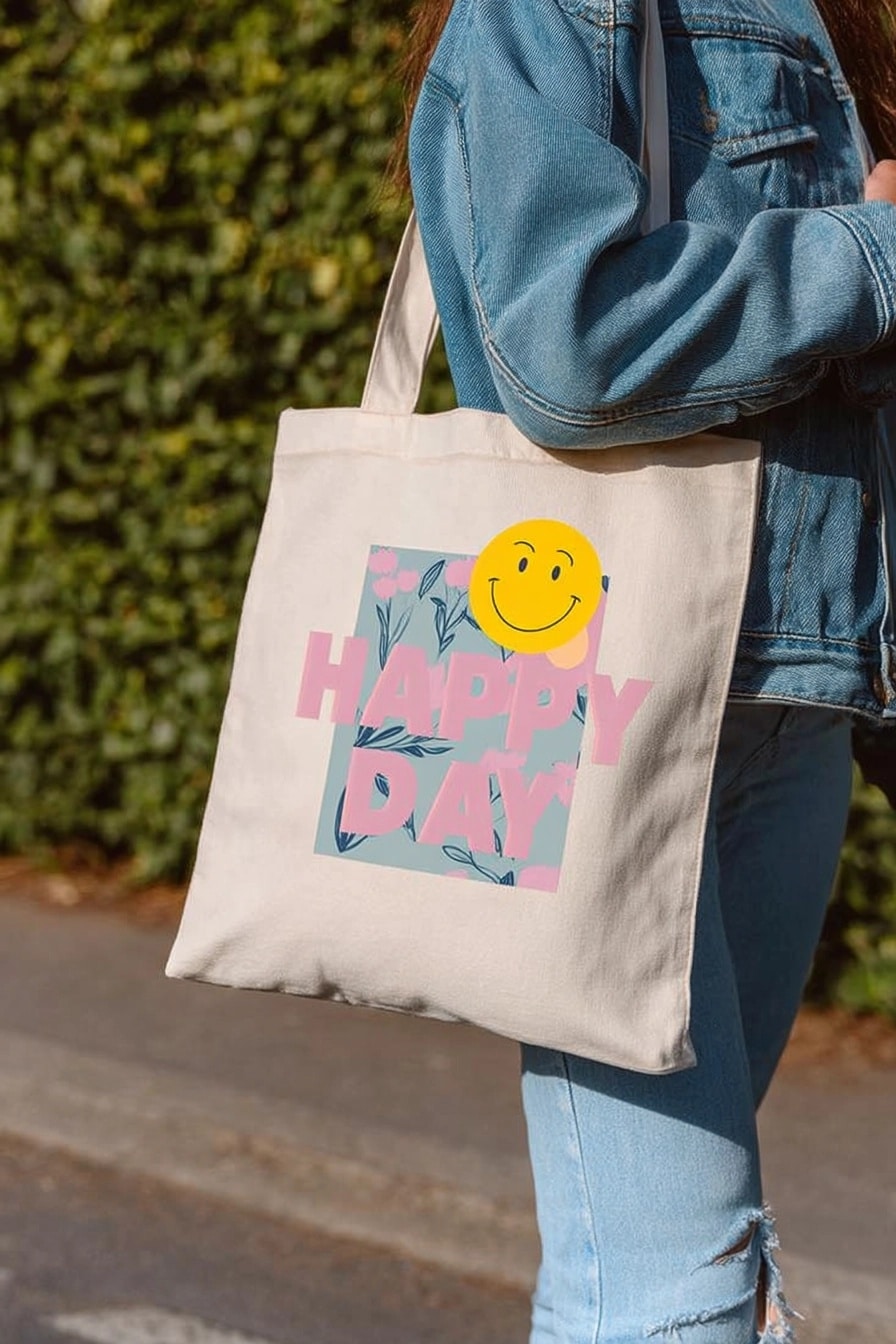
This design feels very current and trendy! It combines text, a graphic background element (the floral block), and a classic smiley face.
Layering is key here. Paint the background rectangle first. Once dry, add the text and the smiley face on top. Using contrasting colors helps each element stand out.
This style mixes clean graphic elements with a playful vibe. It shows you can combine different simple ideas onto one bag for a cool, custom look.
20. Abstract Blue Cat Silhouette
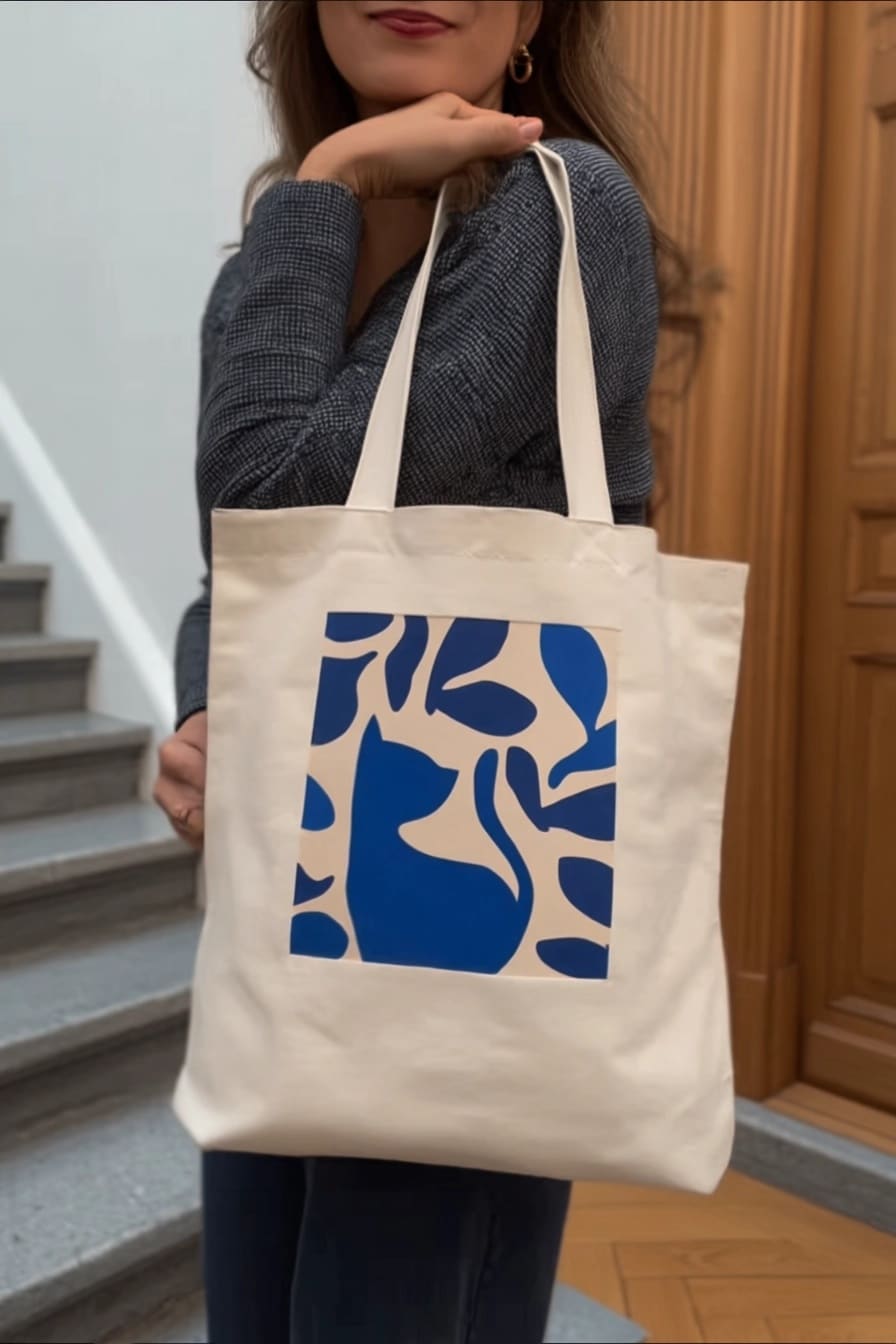
Love cats and modern art? This abstract silhouette is inspired by artists like Matisse and looks super chic. Plus, it’s easier than it looks!
Focus on the simple, cut-out shapes. Paint a solid blue rectangle first (or whatever background color you like). Let it dry.
Then, using the bag’s natural canvas color as your ‘second color’, paint the negative space around the cat and leaf shapes within the blue rectangle. It’s like painting the background!
21. Boho Black Line Dreamcatcher
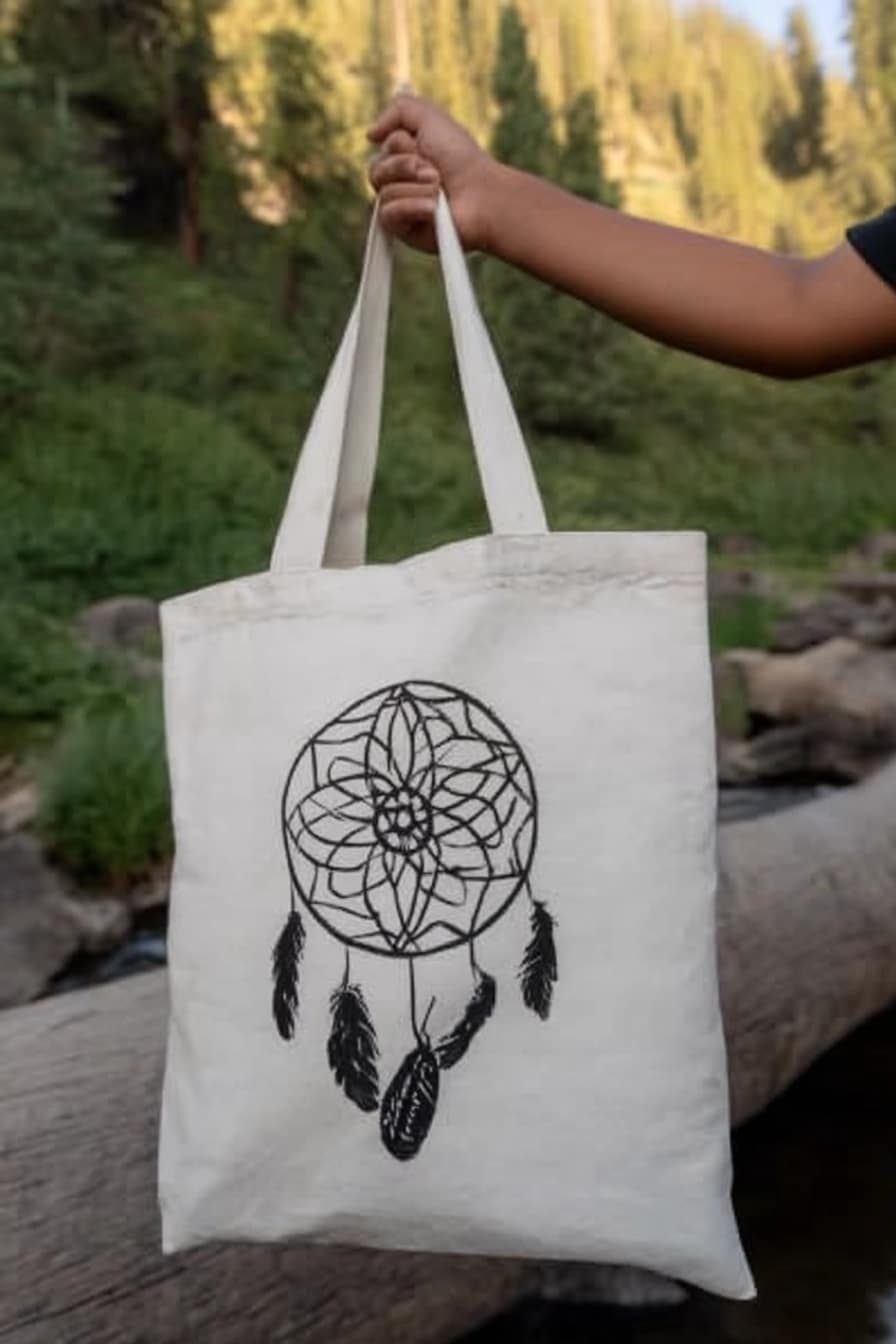
For a touch of boho style, a dreamcatcher design is perfect. Using just black paint or a fabric marker keeps it simple and graphic.
Start with the main circle. Then add the web inside – don’t worry about making it perfectly symmetrical! Draw a few simple feathers hanging down.
A fine-tip black fabric marker gives you great control for detailed line work like this. Remember to put cardboard inside the bag so the ink doesn’t bleed through!
22. Mixed Doodle & Abstract Fun
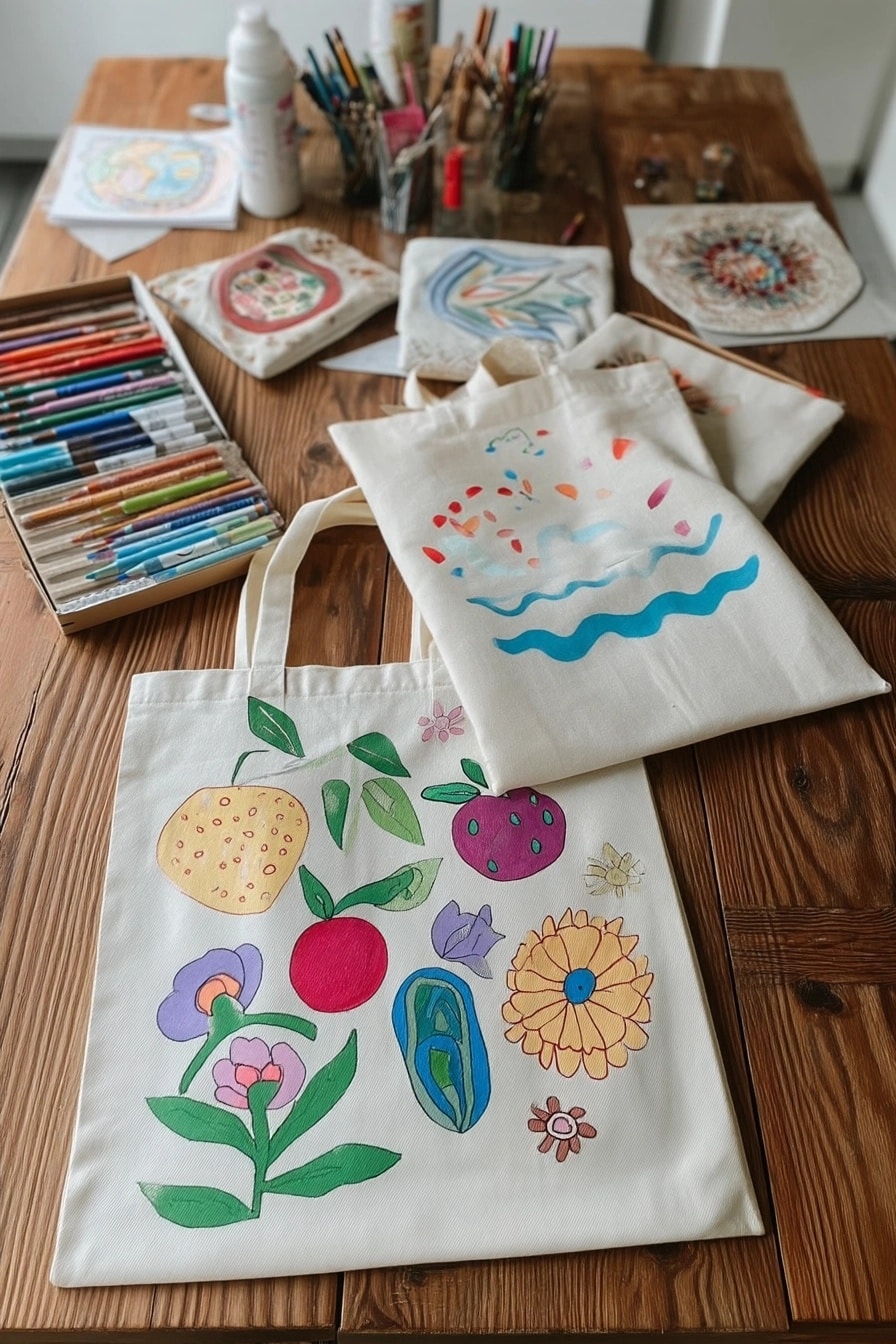
This looks like a fun craft session! The bag in front combines abstract shapes with simple flower and fruit doodles. A little bit of everything!
There’s no single theme here, just playful creativity. Paint some wavy lines, add a simplified flower, throw in a colorful blob – it all works together.
This approach is great if you’re feeling indecisive or just want to experiment with colors and shapes. Let your creativity run wild!
23. Simple Colorful Toucan Bird
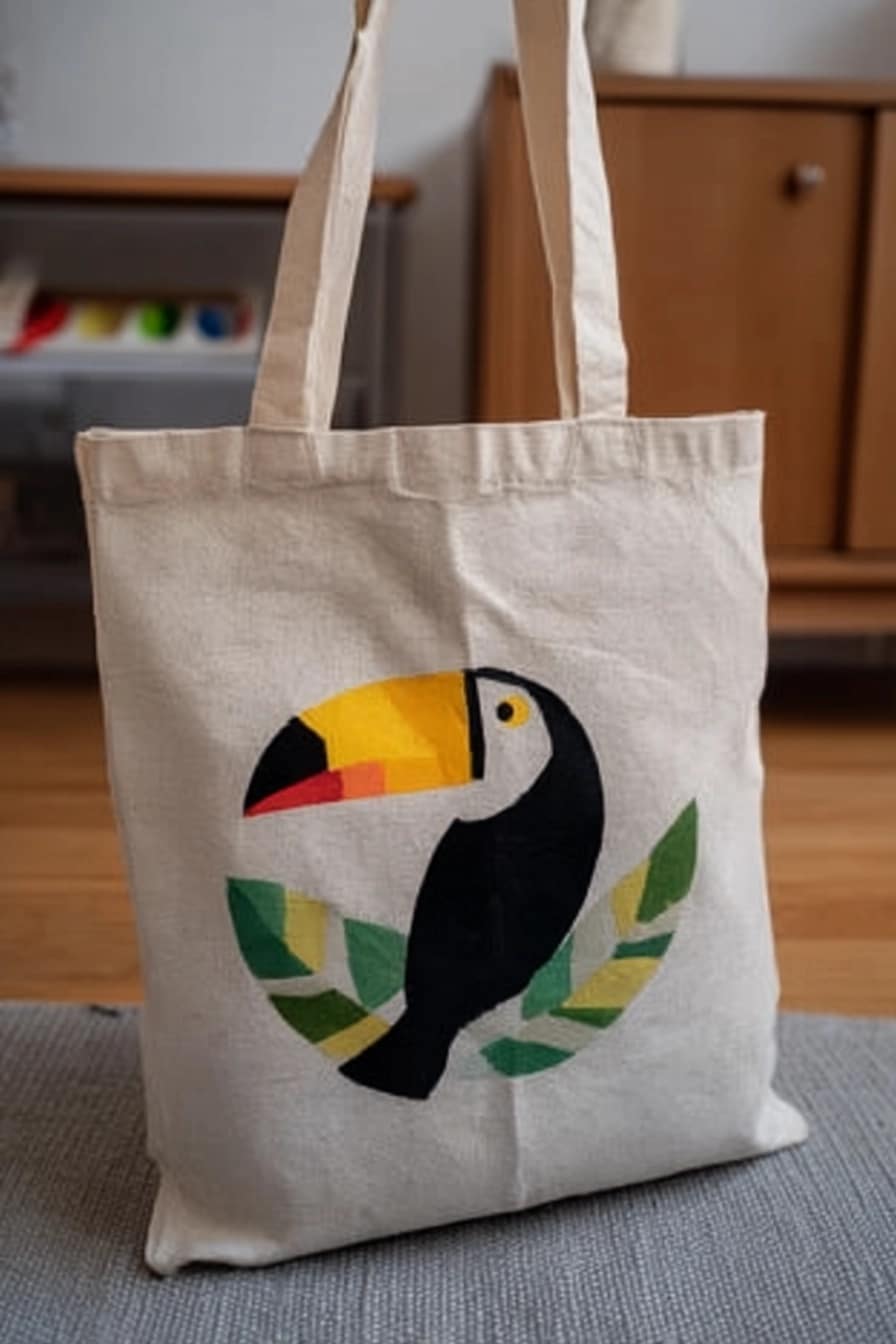
Bring a touch of the tropics to your tote with a colorful toucan! This design uses simple, blocky shapes which makes it easier to paint.
Focus on the main parts: the black body, the big colorful beak, and maybe a few green leaves. Sketch the outline lightly first if it helps.
The beak is the star here! Have fun layering those bright colors – yellow, orange, red. Let each section dry a bit before painting the next to keep the colors clean.
24. Edgy Painted Flame Design
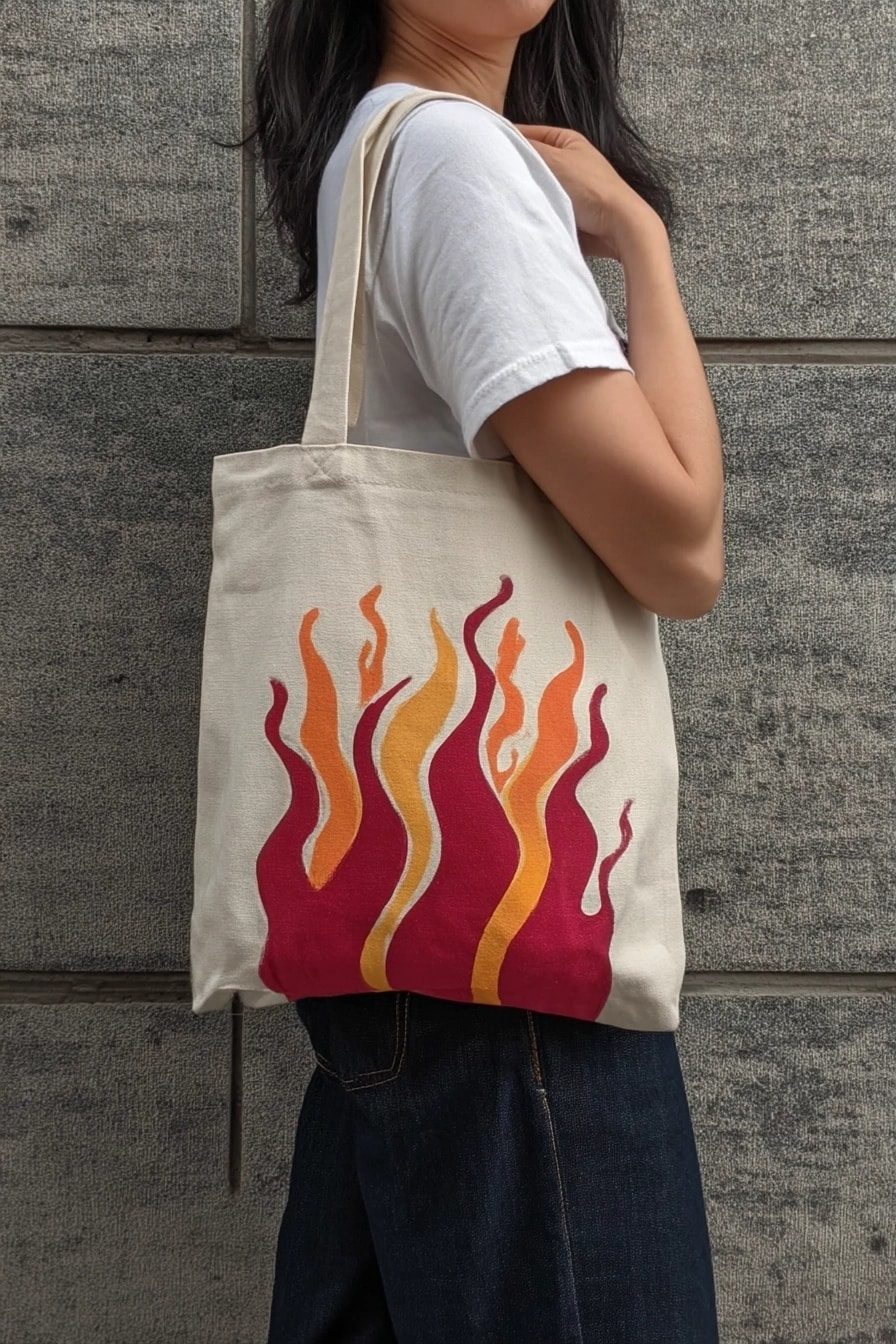
Feeling fiery? This flame design is seriously cool and adds a bit of edge to your basic tote. It’s all about those wiggly, upward shapes.
Start with the tallest flames in the back (maybe red). Let them dry slightly, then layer shorter orange flames in front, and finally yellow flames lowest down.
Blending the edges where the colors meet can give a nice gradient effect, but the distinct color blocks look great too. This is way easier than it looks!
25. Cheerful ‘Smile’ Floral Border
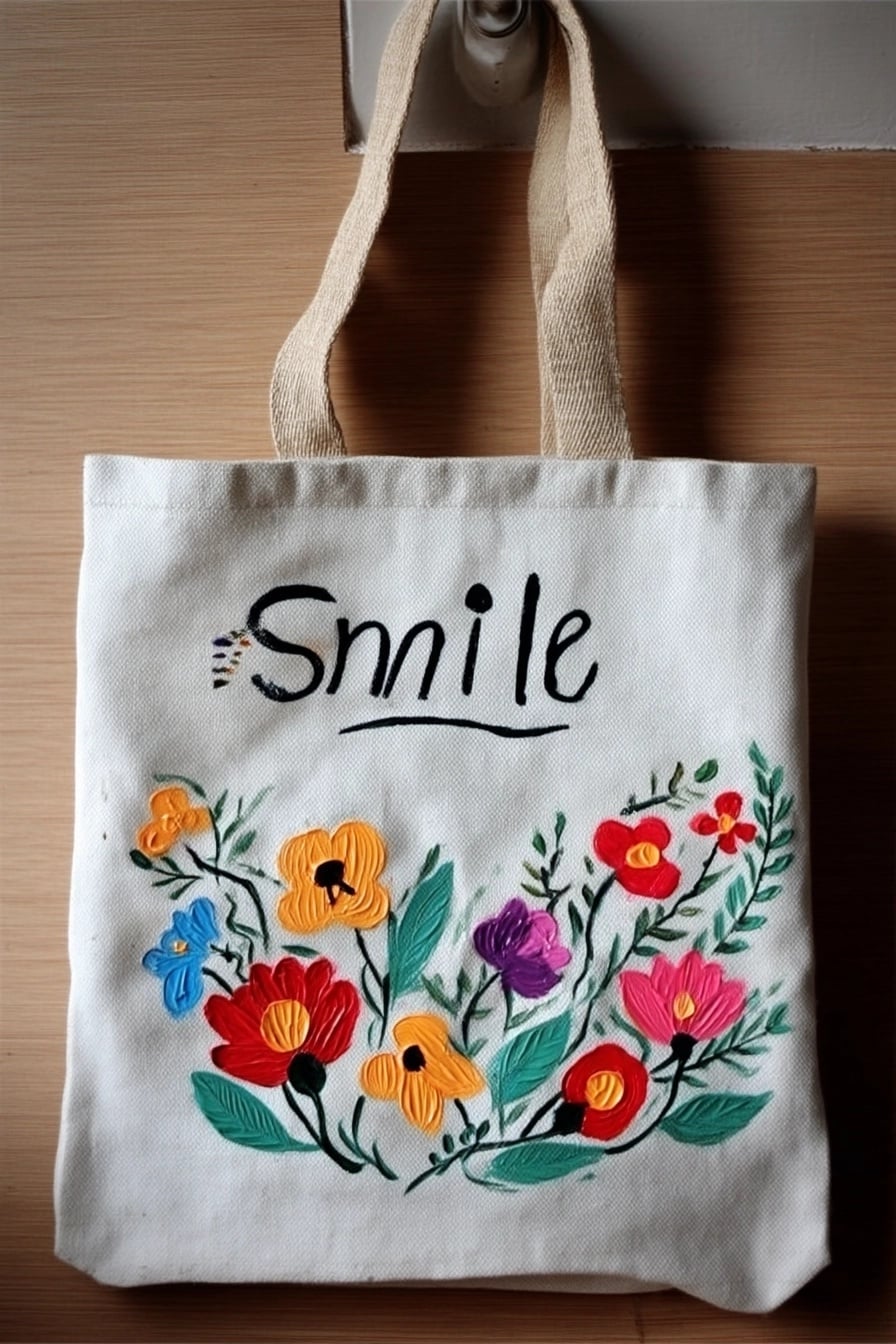
End on a happy note! This tote combines simple lettering with a cheerful border of easy-to-paint flowers. A classic combo that always works.
Paint the word ‘Smile’ first – use a stencil or trace it if you want neat letters. Then, add the floral border underneath using simple flower shapes and leaves.
Mixing different simple flower types (like daisies, tulips, abstract blobs) and colors makes the border lively. It’s a lovely, positive design anyone can tackle.
FAQ:
What kind of paint is best for easy tote bag painting?
Acrylic craft paint or fabric paint works wonderfully on canvas tote bags. Both offer vibrant colours and good coverage, and fabric paint is specifically designed to be flexible and washable once heat-set according to instructions.
How can I make tote bag painting easy if I’m not artistic?
Focus on simple shapes, stencils, or abstract designs! Think easy hearts, simple flowers using dots, geometric patterns, or even just your initials or a short quote using letter stencils for a clean, effortless look.
What are some popular easy aesthetic tote bag ideas?
Minimalist line art (like simple faces or botanicals), trendy symbols (like smiley faces or evil eyes), simple colour blocking, or easy abstract patterns are very popular. Short, impactful quotes or single words in a nice font also create a chic aesthetic vibe easily.